Welcome to MAITO! This guide will walk you through installing MAITO and completing the onboarding process.
System Requirements
Before installing MAITO, make sure your system meets these requirements:
- Operating System: Windows 10.0.19041.0 or later
- Architecture: x64 (64-bit) - x86 (32-bit) is not supported
- RAM: Minimum 4GB (8GB+ recommended for local translation)
- Disk Space:
- Base installation: ~500MB
- Local translation models: 2-8GB per model
x64 Only
MAITO requires a 64-bit (x64) Windows system. 32-bit (x86) systems are not supported. To check your system type, press Windows+Pause/Break or search for “System Information” in the Start menu.
Downloading MAITO
- Visit the MAITO website
- Click the Download button
- Save the installer to your computer
- Run the installer and follow the installation wizard
Free Trial
MAITO offers a 14-day free trial so you can explore all features before committing to a subscription. The trial includes:
- Full access to both DeepL and local translation engines
- All translation types (text, documents, websites)
- Unlimited local translations (no character limits)
No Credit Card Required
The free trial starts during onboarding and doesn’t require payment information upfront. You can explore MAITO’s full capabilities risk-free.
Onboarding Process
When you first launch MAITO, you’ll be guided through an onboarding wizard. This wizard helps you set up your preferred translation engine.
Step 1: Welcome Screen
The welcome screen introduces MAITO’s key features. Click Next to continue.

Step 2: Choose Your Translation Engine
MAITO offers two translation engines, and you need to choose your primary engine:
DeepL Cloud Translation
- Highest translation quality
- Supports document translation (DOCX, PDF, PPTX, HTML, TXT)
- Supports website translation
- Requires internet connection
- Requires DeepL API key (free or paid)
- Character-based pricing
Local AI Translation
- Complete privacy - no cloud connection
- Works 100% offline
- No recurring costs
- Supports 32 languages
- Text translation only (documents coming soon)
- Requires compatible hardware

You Can Switch Later
Don’t worry about this choice too much - you can switch between engines anytime from the Settings page. Many users configure both engines and switch based on their needs.
Step 3a: DeepL Configuration Path
If you choose DeepL, you’ll be guided through:
- Enter API Key: Paste your DeepL API key
- API Validation: MAITO verifies your key works correctly
- Language Selection: Choose your default source and target languages
The wizard automatically detects whether you have a Free or Pro API key.
Don't Have an API Key?
If you don’t have a DeepL API key yet, check out our guide on How to Get a DeepL API Key.

Step 3b: Local Translation Configuration Path
If you choose Local AI, you’ll go through:
-
Device Assessment: MAITO analyzes your hardware
- CPU capabilities
- Available RAM
- GPU/VRAM (if available)
- Performance rating: Inadequate to Excellent
-
Configuration Choice:
- Auto (Recommended): MAITO automatically selects and downloads the best model for your device
- Manual: You choose which model to download
-
Model Download: Download progress with real-time status
-
Performance Test: Quick 30-second benchmark to measure translation speed

Rosetta Models Recommended
MAITO will automatically recommend our Rosetta models - custom-trained translation models optimized for 32 languages. These provide the best balance of quality and performance.
Step 4: Complete Setup
After configuration, you’ll see a success screen. Click Finish to start using MAITO!
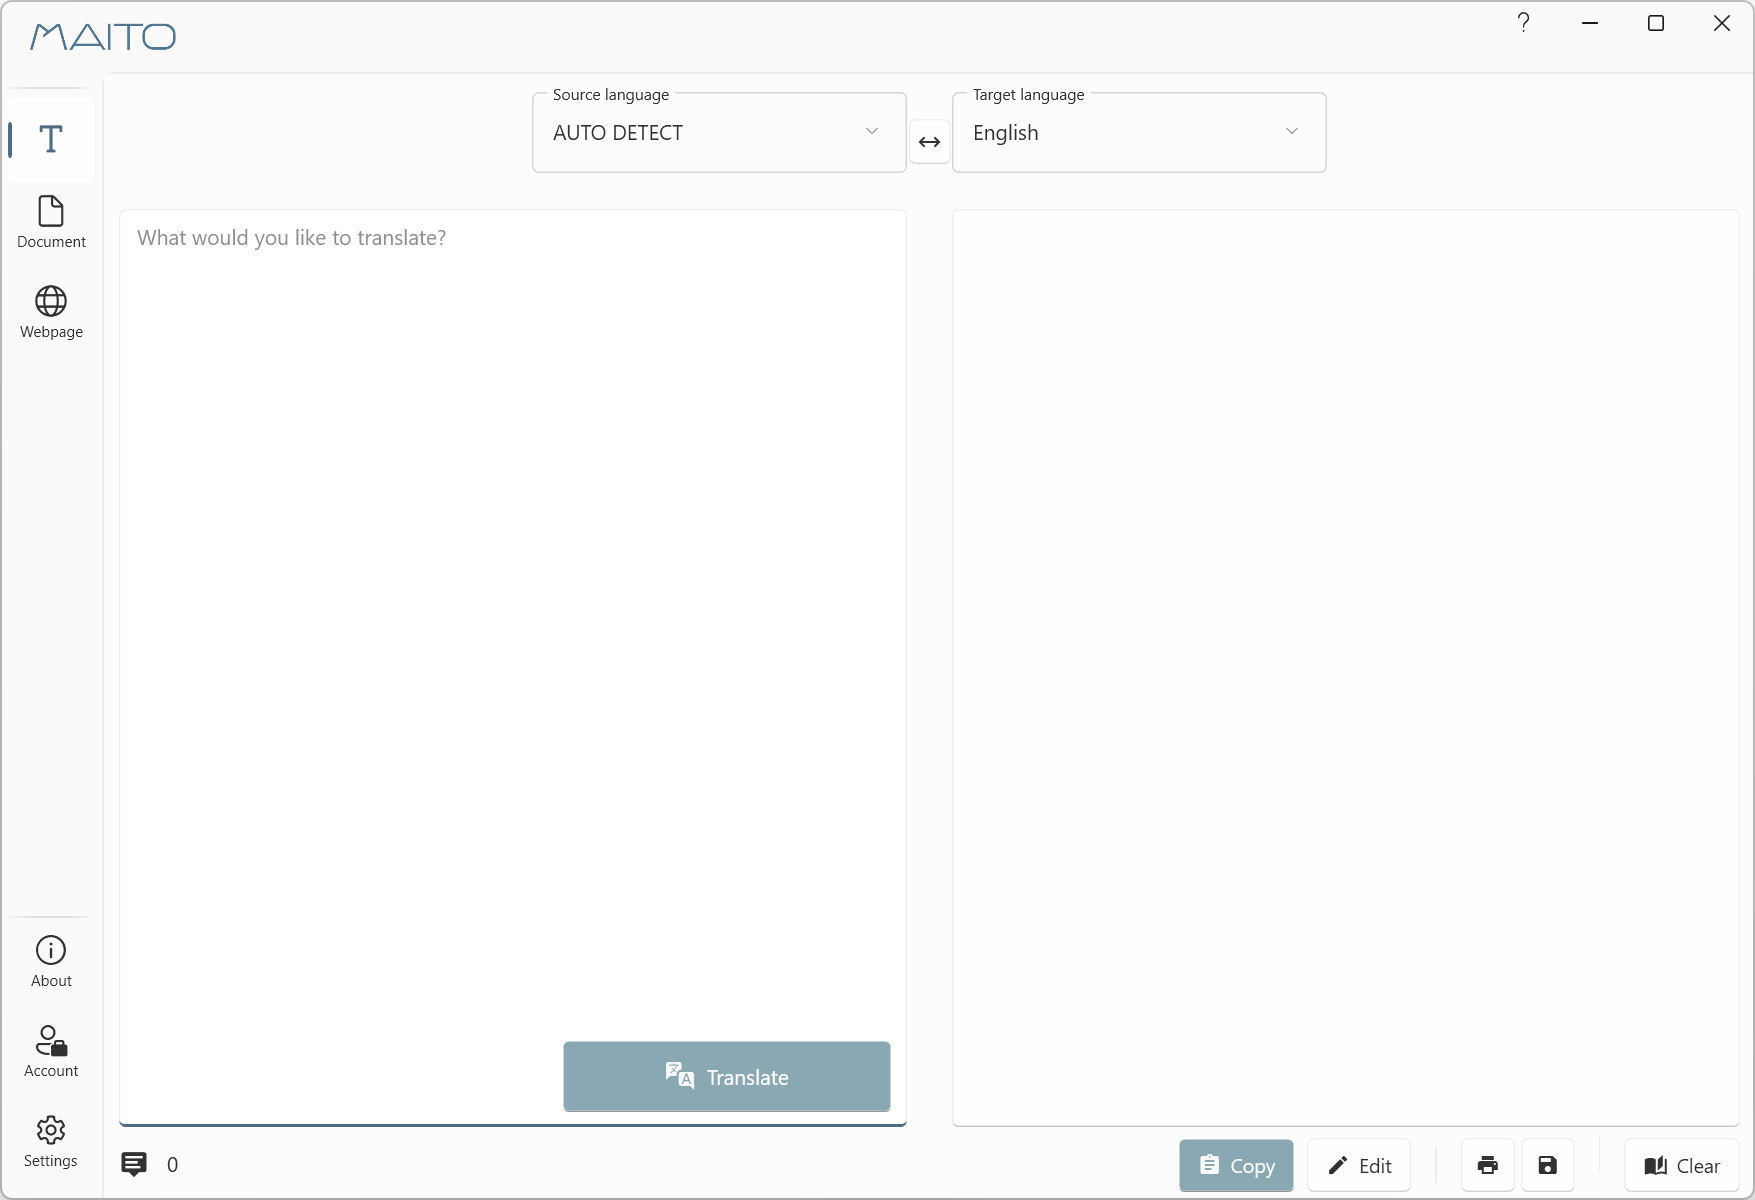
Your First Translation
Once onboarding is complete, you’re ready to translate:
- The main MAITO window will open
- Select the Text Translation tab
- Choose your source and target languages
- Type or paste text in the left panel
- Click Translate or wait for auto-translation
- Your translation appears in the right panel
Global Hotkey
MAITO includes a global hotkey feature. Copy any text anywhere in Windows (Ctrl+C), then press C again within 0.75 seconds, and MAITO will automatically translate it!
What’s Next?
Now that you’re set up, explore these guides:
- Use the Global Hotkey - Translate from anywhere in Windows
- Switch Between Engines - Configure both DeepL and Local
- Translate Documents - Translate DOCX, PDF files (DeepL)
- Understanding DeepL vs Local - Learn which engine to use when
Need Help?
If you encounter any issues during installation or onboarding:
- Check our Troubleshooting Guide
- Contact support at contact@pangaia.software
- Visit the MAITO Help Center
Welcome to MAITO - we hope you enjoy translating with privacy and flexibility!